With the bead roller modified to my satisfaction I tested various thicknesses of ally and steel with both the step rollers and the rounded rollers - no idea what the correct terminology is for them but I was quite excited to get on and actually do the job. First, though, I had to work out what I wanted them to look like. I knew I wanted something fairly simple to match the rest of the interior, which is nearly all straight lines. I knew I wanted either white or cream as a colour but choosing the pattern to emboss took a bit more time. I got one of the panels and drew a few things with varying degrees of rejection from, I am not overly chuffed to, no, I can't stand it. In the end I decided on a single bold embossed line at the top and then a square with rounded corners and straight lines down it, almost so it looked like a period correct material pattern but in steel. I know that probably makes no sense whatsoever, very little in my life does.
I know, maybe a photo or two would help.
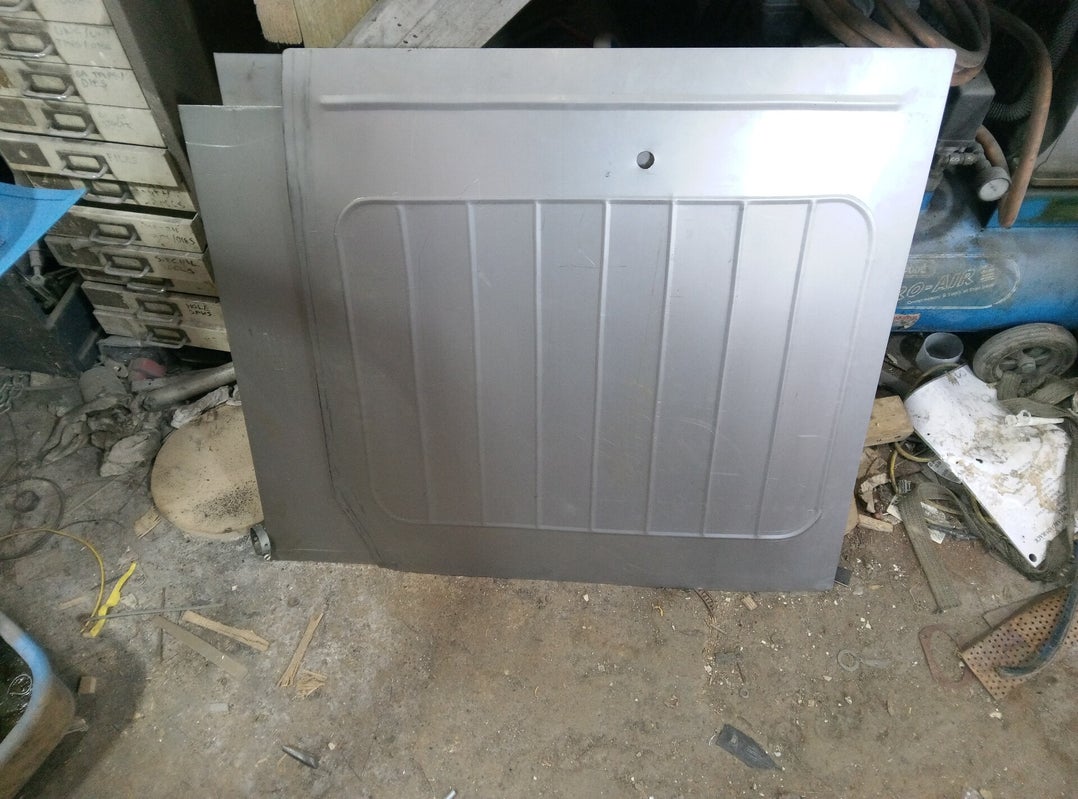
The first panel was a nervous affair, it took quite some time but I think it was worth it. I made a bit of a cock up starting the run far too close to a corner. Fortunately that will rarely be seen as the seat hides it. If I had the metal I would redo it but the cost of steel is hideous.
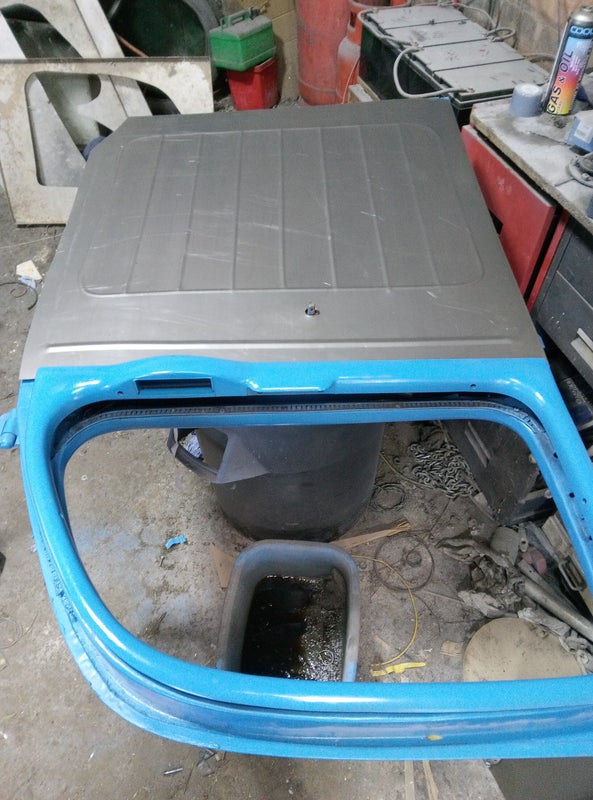
I think I might be losing the plot, this is the front passenger door, for some reason I have plonked the rear drivers side door window trim on it. It's hardly surprising it doesn't fit right. I am quite happy with the look of the embossing though.
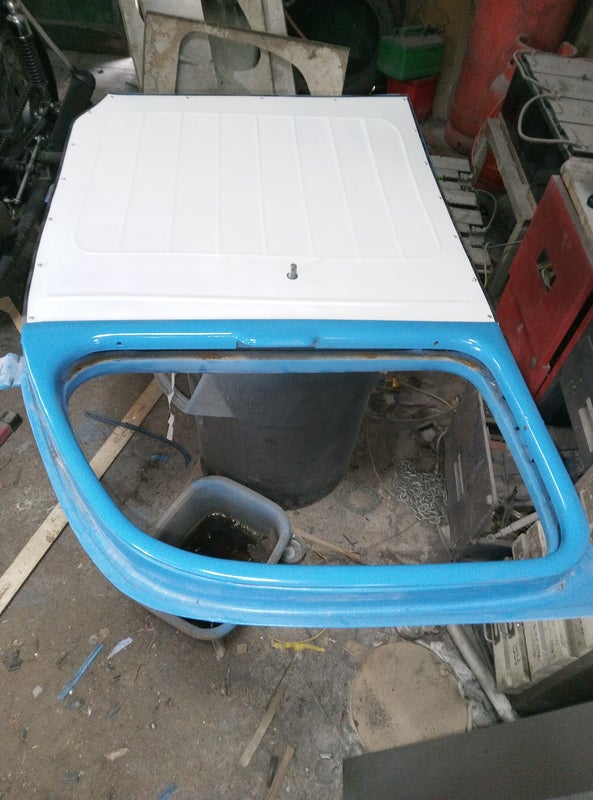
The whole thing looks rather splendid now it's in white, the screws are fitted temporarily as I am waiting for some covers for them. I have found some that are like those commonly used on number plates, they will neaten things up and ensure IVA compliance. You might just notice a black rubber trim running round the panel, IVA again and it will stop any potential buzzing where the panel may vibrate against the door it is screwed to.
I still have to get the trim that the glass runs up and down, don't know what it's called but there are a few specialist suppliers that stock it, it also needs a rubber trim on the outside and a felt trim on the inside to keep things water tight and running smoothly. Then there is the massive elephant in the room of having to find some compliant glass to keep the inspector happy. This is a big chunk of work but it is also a big step towards getting the thing finished. I hope to get the two rear ones done tomorrow, now that I have a better idea of what I am doing. I will be very pleased if I get that far, I can then start looking at the roof lining.
In other news, the ribbed rubber for the top of the running boards arrived today, I shall get that cut and glued on soon which will be another job ticked off the to do list.
In other, other news I also got the fibre glass roof panel properly fitted, that went a lot better than I could have hoped for. It has a rubber seal round it that my arthritic fingers found hard going to fit but it went on ok in the end. You then have to carefully position the panel centrally and squarely on the roof, go round the edge with masking tape so you put it back exactly the same, remove it, apply a bead of Wurth polyurethane and then put it back. It's pretty much vital to have 2 people doing this as you don't want to get fingers in the wet PU and risk not getting a perfect seal. Once it's back down you have to drill and rivet the panel, this pulls it down hard, I really can't imagine water getting past it and in to the car. Just to make doubly sure I used the rest of the PU inside the car, I reckon it could double as a submarine, as far as the roof is concerned anyway. I lost count of how many rivets I fitted, I guess it was about 50 or 60, I was glad to be finished.
Add comment
Comments